Create Your Own VPN Server
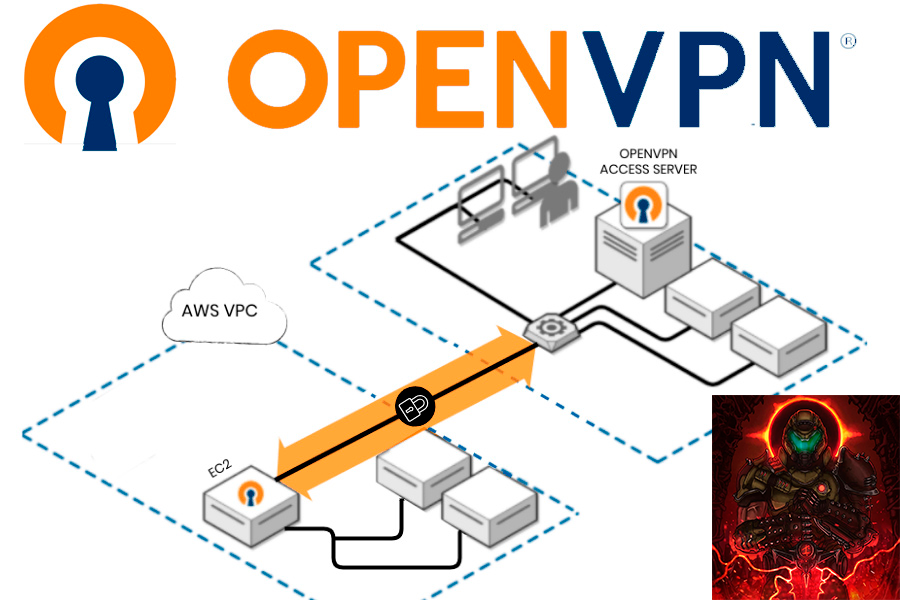
In today’s post we are going to see how to configure a VPN server with OPENVPN in Debian 11 in 10 minutes. By having your own VPN server, you won’t need to trust any more in a VPN service provider, and you will have control of your data.
Having your own VPN server is cheaper than paying for a subscription in any public VPN providers, in my case, I rented a VPS server in a foreign country (recommended), this way my IP changes to another country’s IP when I connect to it, obtaining the same result as with conventional VPN.
Requirements

Access Server hardware requirements are primarily specific to your bandwidth utilization. For example, if you run a VPN server to connect to a single web server through the VPN tunnel, then the requirements are much less when compared to running a server that redirects all internet traffic. The traffic passing through a VPN connection utilizes processing capacity for encrypting and decrypting on both the client and the server side. To correctly estimate the sizing of your Access Server, you must estimate how much sustained bandwidth you need to route through the VPN server and estimate the CPU size accordingly. Memory size and disk space are more predictable.
Memory requirements depend on the number of connected devices and the level of NAT traffic your VPN server needs to process. At a minimum, you must start with 1GB of memory, and add approximately 1GB for each 150 connected devices. Again, note that this is a rough estimate but should serve as a basis for estimating memory size.
In our case we won’t have more than 5 clients so 1/2GB is enough.
Installation & Configuration
The first thing we need to do is to update and upgrade our Debian 11 if we haven’t done it yet sudo apt update && apt upgrade -y.
Once our debian is updated, we are going to check our IP address, remember that if you do this at home, you will need to open ports in your router and redirect the traffic to your local machine by port forwarding, as I said I’m using a VPS server, so the ifconfig command will show my public IP address.

Note your IP address, you will need it later.
We will use the following script which can be downloaded here, which will help us to configure the VPN server through an interactive menu, it’s made in bash.
We can download the script in our Debian 11 with the following command wget https://github.com/angristan/openvpn-install/master/openvpn-install.sh.
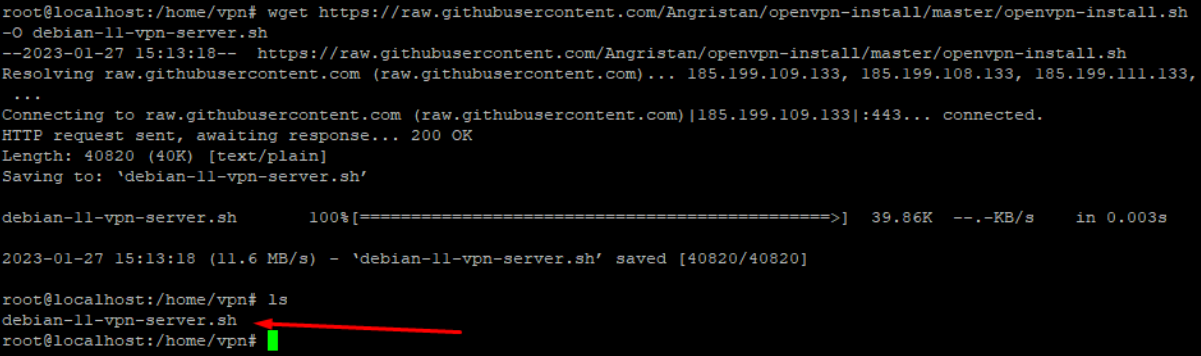
One we have the script, we give it execution permissions.

We can now execute the script and start with the configuration, it will first download the OpenVPN software and other tools like Easy-SSL, Iptables…

Once everything is installed, you will be asked for our IP, I’m hiding it cause is my Public IP address, but if you are on a private network will be your private IP.

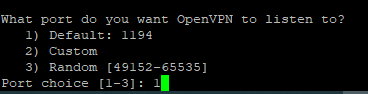
Select the port you want the service to run on, this is the port that you will need to open in order to be reached from the outside of your network, I will leave it as default.
As protocol we will use UDP, as you may know, UDP does not check the integrity of the packets, is faster and easier to handle by our processor, in a VPN we want a fast network, so I will go for UDP.

Now we will be asked for which type of DNS servers we want our VPN server to use when resolving the client requests, I recommend the AdGuard DNS, cause they block ADS from the websites and browsers, we won’t lose speed cause of this.

We won’t enable compression for the same reason that we didn’t select TCP.

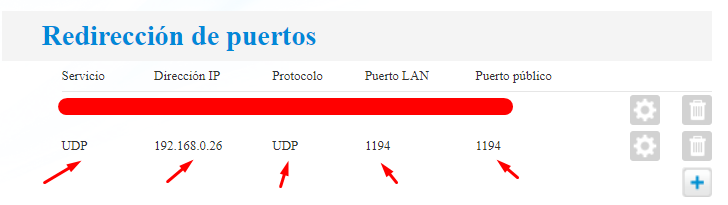
Now we need to configure our firewall in order to let the clients connect to our server from the outside, for this, I need to get into the VPS control panel and add a new firewall rule, remember we used UDP and the default port 1194.
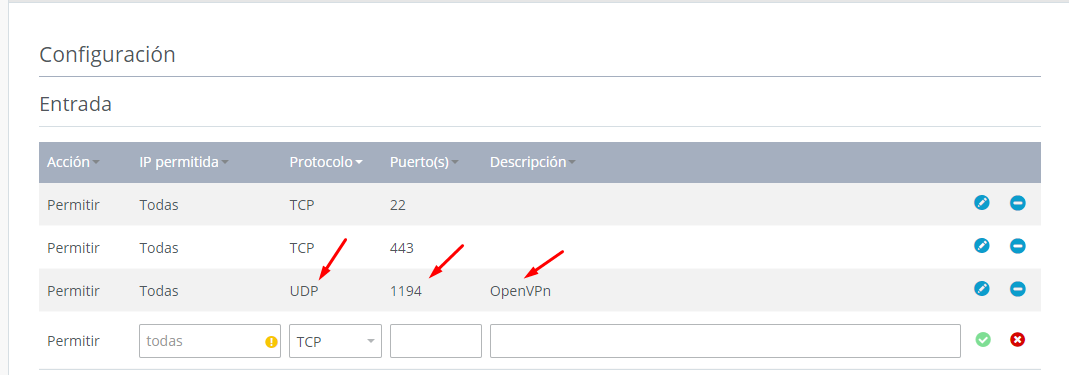
If you are on a private network you will need to enable port forwarding in your router to your internal IP address.
And that’s everything! You will have your VPN server up and running.
Management & Client configuration
Once we have everything installed, we need to know how to create/remove users or uninstall the VPN service, we can do this by executing the same script we used for the installation and following the steps, is up to your choice to create users with password or passwordless.

I have created multiple users, now let’s see one example of how to download the client configuration file generated /root/username.ovpn, I will be using scp, which requires ssh service to be running, you need to type scp root@serverIP:/dirfile and authenticate.
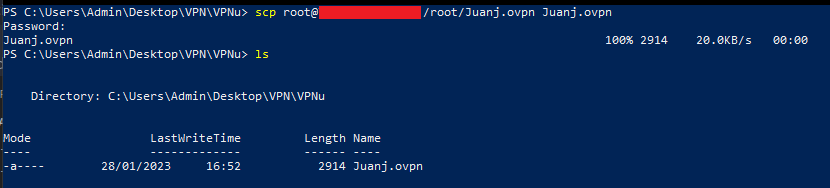
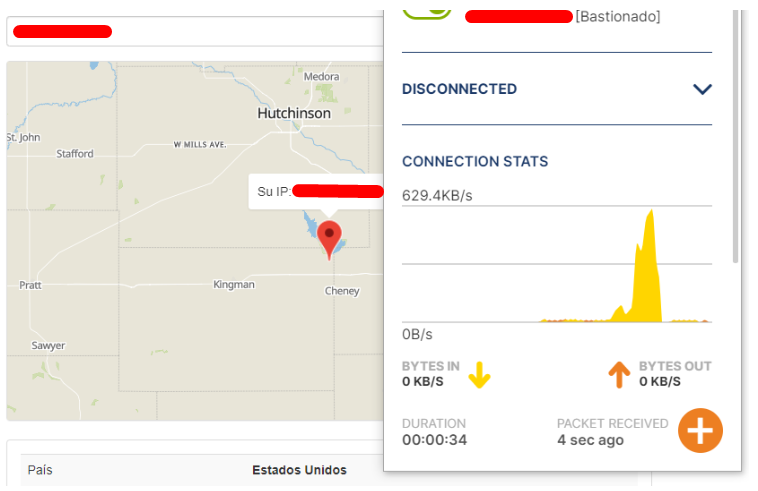
Now download the OpenVPN client and import the configuration file, type the password in case you have one, once we are connected, we can check our IP address.
Interesting files you should know
We must enable the service if we want it to start when the server is restarted systemctl enable openvpn@service or systemctl enable openvpn.
Check the redirect policy is equal to 1 sudo sysctl net.ipv4.ip_forward.

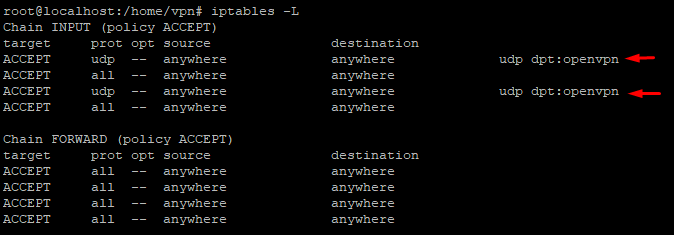
You can list the new iptables rules created in the installation iptables -L.
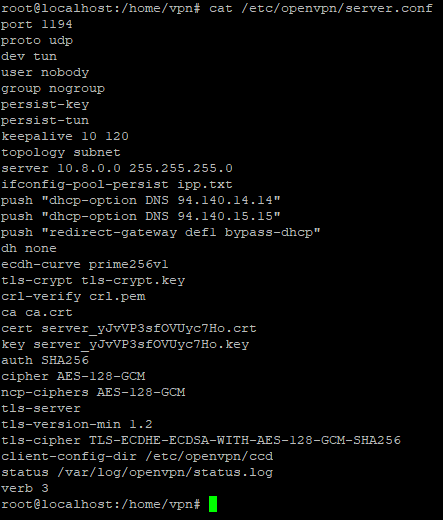
And finally you can change the openvpn configuration file if you wish nano /etc/openvpn/server.conf.
Enjoy your new VPN server and privacy!.