Create your Pivoting networks with Vmware
The first thing we need to do is create the “VMnets”, VMnets are virtual networks that can be created with VMware Pro and emulates a real world network.
All the machines used in this post can be downloaded from VulnHub.
In order to be able to create networks, we need the Pro version of VMware software, which can be found here.
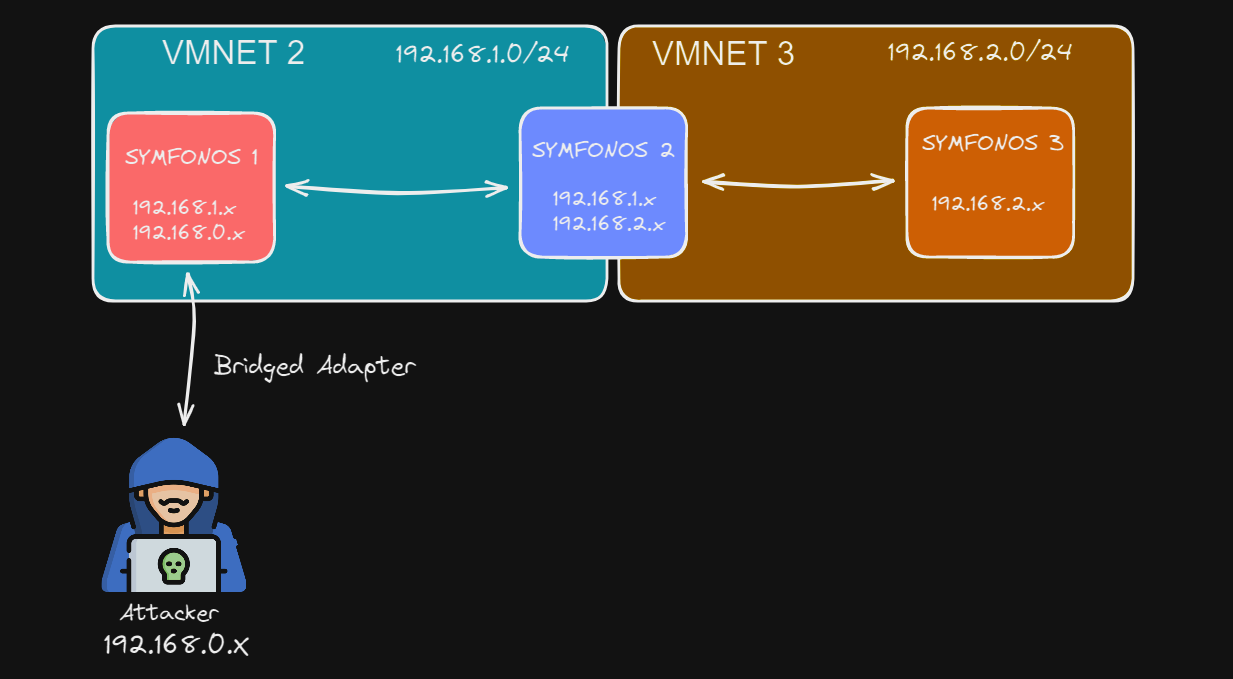
I’m going to explain how to assemble the network from the picture, once you learn how to do it, you should be able to create new environments by yourself.
What is a VMnet
A VMnet in VMware is a virtual network that is used to connect virtual machines to each other, as well as to the host system and the external network. When you create a virtual machine in VMware, you can choose to connect it to a specific VMnet, which provides the virtual machine with network connectivity.
VMware provides several types of VMnets, each with a different purpose and network configuration.
Default VMware VMnets:
- VMnet0, is the default network and is used to connect virtual machines to the host system and the external network using the host’s physical network adapter.
- VMnet1, is a host-only network that is used to allow communication between virtual machines and the host system only.
Other types of VMnets include bridged networks, which allow virtual machines to connect to the external network as if they were physical machines on the same network, and NAT networks, which allow virtual machines to share the host system’s IP address for outbound network connections.
Overall, VMnets provide a flexible and powerful way to configure network connectivity for virtual machines in VMware.
Creating VMnets in VMware
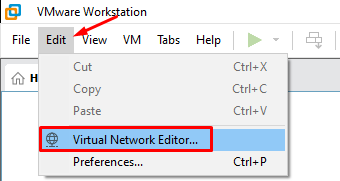
To start creating our VMnets, we need to navigate to the top menu of our VMware Pro Client and select the Edit option, a drop-down menu will appear, click on Virtual Network Editor.
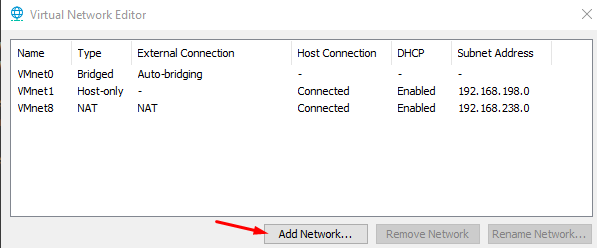
The Virtual Network Editor menu will spawn, here we can create/delete/modify everything related to the VMnets, as mentioned before, you will probably have only the VMnet 0 and 1, sometimes new VMnets are created when we execute a virtual machine, this is the case of my VMnet8 network, but doesn’t matter, click on Change Settings to start editing.

If you are new in VMware, try no to edit this 2 interfaces, you may lose connectivity in your machines. That’s why we are going to create 2 new VMnets (VMnet 2 and Vmnet 3) with the IP ranges specified in the network picture.
Add a new network:
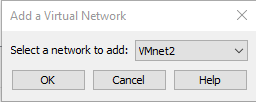
Select VMnet2:
Once the new virtual network is created, we can start editing, the first thing we are going to do, is setting the correct network range according to the network diagram, enable the DHCP service, so that the machines get IP automatically and chose Host-only network, whit this configuration, Symfonos1 and Symfonos2 will be able to reach each other, but they won’t have an internet connection:
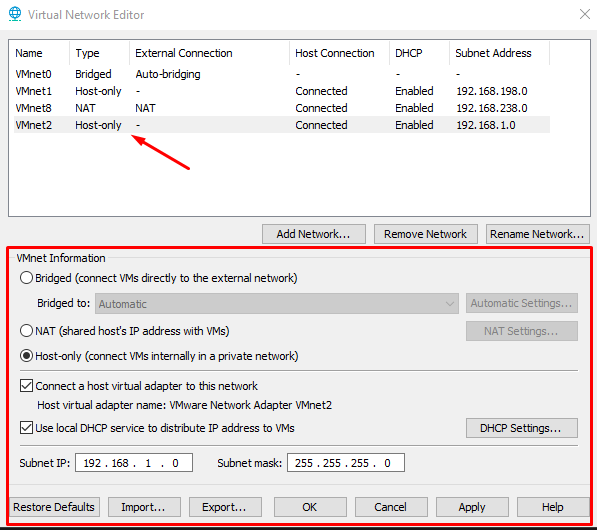
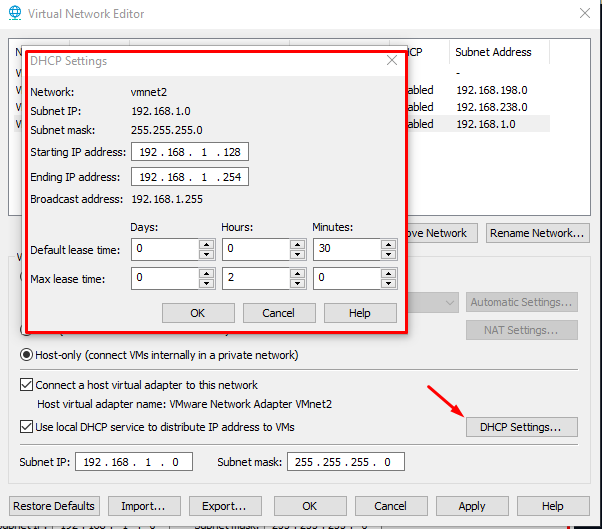
We can also edit the DHCP pool if we want, but I won’t do it in this case, just check that everything is correct and press okay.
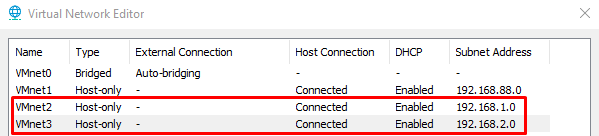
We are done with the first network, now follow the same steps to create the VMnet3 with a different Network address 192.168.2.0 in my case, after creating the second virtual network, you will have something like this:
We created all the networks needed for our lab, but you are probably wondering, how we are going to connect the attacker machine (Our Kali Linux) to Symonfos 1?.
There’s one problem here and it’s that Kali Linux doesn’t let us to use 2 adapters at the same time (or I don’t know how to do it), so if we create another VMnet for Kali Linux and Symnfonos 1, we will lose internet connection on our Kali, that’s why we will use the bridged adapter to connect these two machines, they will be communicating over your home network, you will be able to communicate with Symfonos 1, without losing your internet connection.
If your home network is 192.168.1.0/24 don’t use this address for VMnet2, use a different network address.
Configuring the hosts
As I mentioned at the beginning, all the Synfonos machines can be downloaded from VulnHub.
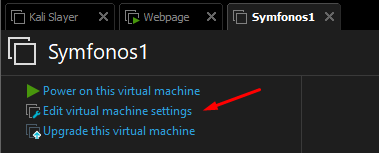
Once you download them, import the virtual machines to VMware and edit the configuration, we will start with Symfonos 1:
Once the configuration menu spawns, you will need to add a new network adapter, you can do this by clicking Add in the bottom, and selecting Network Adapter.

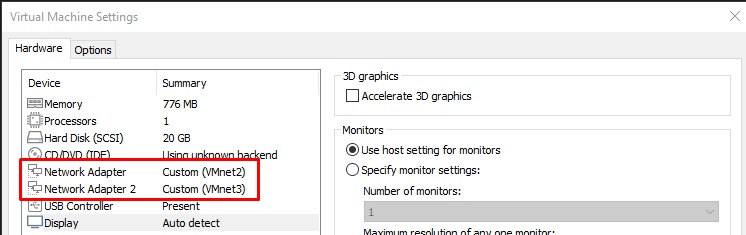
Now we have 2 network adapters, we must assign one to the Bridged Network and the other one to VMnet2, click on the first one and select Bridged.

And in the other one select the VMnet2 we just created.

We are done with Symfonos 1, now we need to do the same with Symfonos 2 but we will use VMnet2 and VMnet3, Symfonos 2 will be able to communicate with Symfonos 1 and Symfonos 3, but the attacker won’t be able to reach Symfonos 2 without pawning Symfonos 1.
Symfonos 2 Configuration:
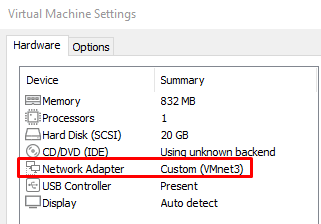
Lastly Symfonos 3 Configuration, which will be able to communicate only with Symfonos2 and will share VMnet3:
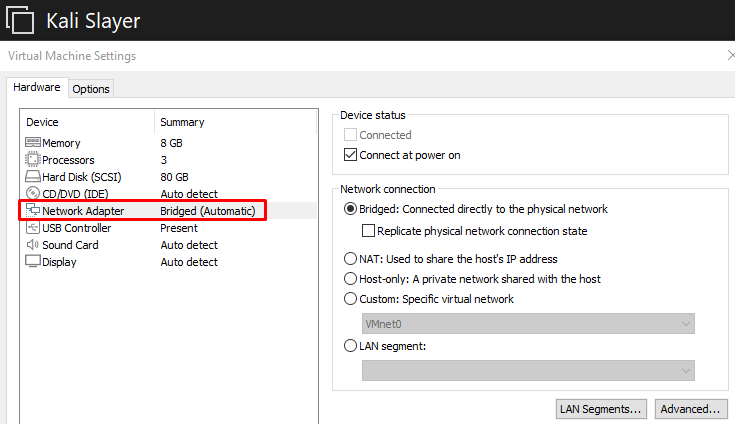
Also, remember to set to bridged the adapter from your Kali/Parrot machine.
Verify the connectivity
Power on all the virtual machines and ensure your Kali can see Symfonos 1.
- From Kali Linux to Symfonos 1
Perform a Nmap scan in your home LAN to discover the IP of Symfonos 1.
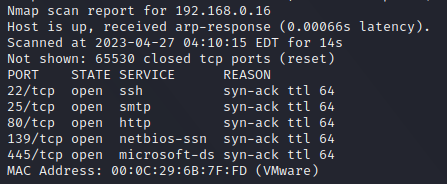
We can access with Firefox to the webserver of Symfonso 1, to ensure everything is working.

As you can see, we are only able to reach Symfonos 1, in order to discover Symfonos 2 and 3 you will need to perform pivoting techniques once you gain access to Symfonos 1, the exploitation of this machines is not covered in this post, but I will release a Pivoting guide soon!.
This is the exploitation path you will need to perform:
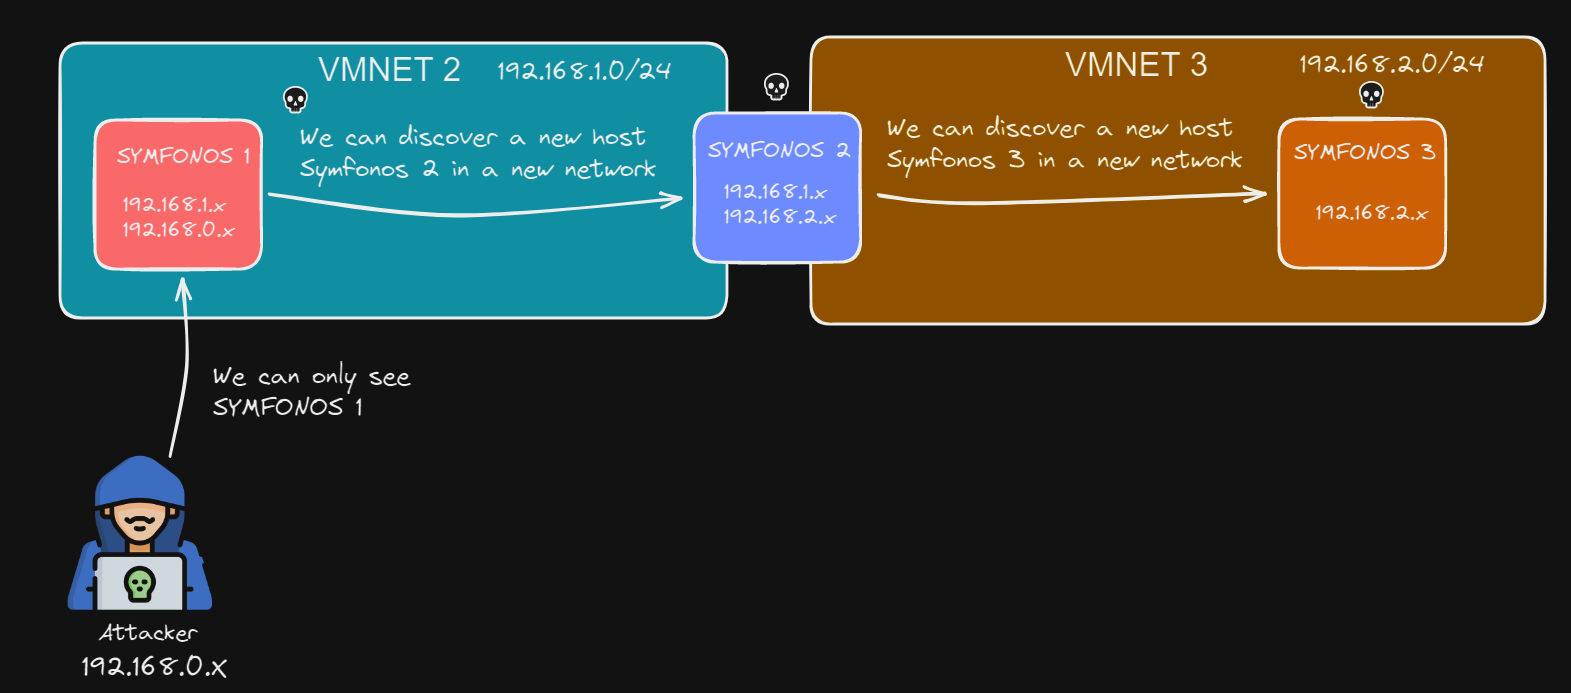
Remember that this is only an example, you can change the Network Addresses of your VMnets and add or remove hosts, but you should follow the logic explained in this post.
Debugg
If you are not able to reach a machine with this configuration, ensure you have activated DHCP into the Virtual Network Editor for each network and the DHCP pool is correct.
Sometimes this machines doesn’t grab an IP automatically, you may need to login as root and change the IP configuration manually, or use another machine from Vulnhub which works.
I hope you have learned how to create your own VMware Networks to practice Pivoting, see you in the next post!.